Crispy Buffalo Chicken and Cauliflower Bake

Did you know cauliflower is loaded with fiber and B-vitamins? It is also full of antioxidants and phytonutrients that help fight against cancer. Better yet, it is a low carb alternative to grains and legumes!

Cauliflower is so versatile and easy to add to your diet. It can be consumed raw and also cooked in many different ways such as steamed, baked, roasted, sautéed, and so much more!!

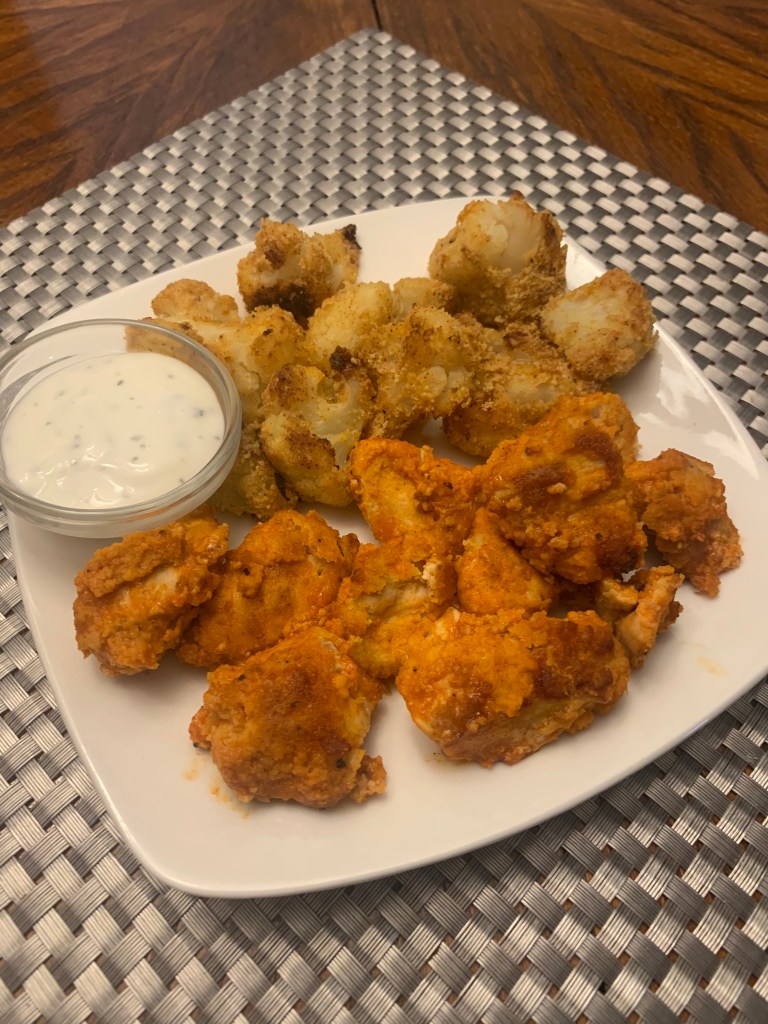
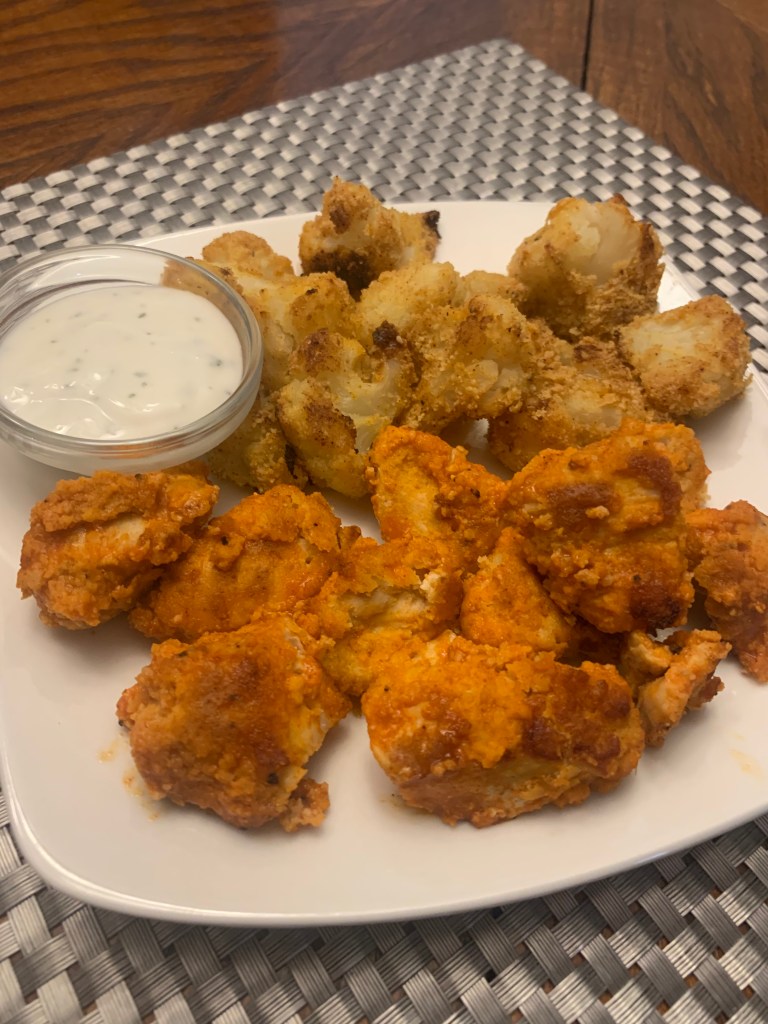
Below, you will find a buffalo chicken and cauliflower recipe that is baked and made with simple ingredients.

As always, let me know how you like it when you give it a try!

INGREDIENTS

FOR THE CAULIFLOWER

  • 1 (small-ish) head of cauliflower, cut into florets
  • 1 + 1/2 tbsp avocado or olive oil
  • 1/4 tsp sea salt
  • 1/4 tsp paprika
  • 1/4 tsp garlic powder
  • 1/4 tsp onion powder
  • Black pepper, to taste

FOR THE CHICKEN NUGGETS

  • 1.5 lbs chicken breast, cut into “nuggets”
  • 2 eggs
  • 1 + 1/4 cup super fine almond flour
  • 1 tsp sea salt
  • 1 tsp paprika
  • 1/2 tsp garlic powder
  • 1/2 tsp onion powder
  • Dash of cayenne
  • Black pepper, to taste
  • Oil spray, for the baking sheet
  • 1/2 cup buffalo sauce of choice

INSTRUCTIONS

  1. Preheat oven to 450°F and line a large baking sheet with parchment paper. Spray the parchment with avocado or coconut oil spray to grease. 
  2. In a large bowl, mix together the almond flour and the seasonings for the chicken nuggets. Set aside.
  3. Cut the cauliflower into florets. Toss the florets in a large bowl with the olive oil, then toss again with all of the seasonings. Transfer to the bottom half of the baking sheet.
  4. In the bowl that you tossed the cauliflower in, whisk the eggs for the chicken.
  5. Dip each chicken nugget in the egg, allowing excess to drip off, then dredge in the almond flour mixture and lay them out on the top half of the baking sheet. *Try to use one hand for the egg wash and 1 hand for the almond flour mixture, to avoid the almond flour mixture getting lumpy. 
  6. Bake for 12 minutes. Remove from oven and carefully flip each chicken nugget and gently toss the cauliflower, then return to oven for another 12-16 minutes, until nuggets are slightly browned and crispy. 
  7. Remove from oven, then toss nuggets with buffalo sauce in a large bowl until well coated. I then like to pop everything back in the oven for a minute or 2 to get the sauces heated through. 

Pumpkin Cinnamon Rolls

These ooey gooey vegan pumpkin cinnamon rolls are the perfect treat to make for breakfast or brunch. They’re made from scratch which makes them taste just like grandmas recipe. Even better than that, they’re completely vegan! I swapped butter for coconut oil and regular milk for almond milk. Trust me, they taste just like the dairy version!

If you plan to make these, make sure to set some time aside. This homemade delicious treat will need your attention! It definitely worth the commitment.

If you tried this recipe out, please let me know in the comments below! I would love to hear from you!

INGREDIENTS

Pumpkin Dough

  • 1 0.25-oz. pkg. active dry yeast
  • 2/3 cup warm water (divided)
  • 3 1/3 cups bread flour, plus more for rolling dough
  • 2 Tablespoons coconut sugar (or cane sugar)
  • 1 1/2 teaspoons sea salt
  • 2/3 cup canned pumpkin puree
  • 3 Tablespoons melted coconut oil, plus more for greasing

Cinnamon Sugar Filling

  • 1/3 cup packed light brown sugar
  • 2 teaspoons ground cinnamon
  • 2 Tablespoons melted coconut oil

Frosting

  • 2 Tablespoons almond milk
  • 1 cup confectioners’ sugar

INSTRUCTIONS

  1. To make pumpkin dough: Stir yeast into 1/3 cup warm (105°–115°F) water until dissolved. Let stand 10 minutes.
  2. Combine flour, sugar, and salt in bowl of your stand mixer and combine using the dough hook on low speed for about 1 minute. 
  3. In a medium bowl, whisk together wet ingredients: pumpkin, coconut oil and 1/3 cup warm water. 
  4. With mixer running at low speed, add yeast mixture and pumpkin mixture to your dry ingredients by pouring them down the inside of the bowl. Increase speed to medium-low, and mix 2 minutes. 
  5. Let dough rest 5 minutes. Mix at medium-low speed 5 minutes, or until dough is smooth. Increase speed to medium and mix 2 minutes. Kneading is done when dough makes a slapping sound as it hits the side of the bowl. Dough temperature should be close to 90°F.
  6. Once combined, place dough in oiled bowl and cover. Let rise 1.5-2 hours, or until doubled in volume.
  7. While dough is rising, make cinnamon sugar filling by stirring together brown sugar, cinnamon and coconut oil in a bowl. Grease 13 x 9-inch baking sheet or round 9.5-inch pie pan with coconut oil.
  8. Sprinkle extra flour on your surface and rolling pin and roll dough into 14 x 12-inch rectangle. Sprinkle cinnamon sugar mixture over dough and smear it all over the surface with your fingers. Starting at the top, roll the dough toward you into a large log, moving back and forth down the line of dough (in a “typewriter” motion) and always rolling toward you. Roll it tightly as you go so the rolls will be nice and neat. When it’s all rolled, pinch the seam closed and turn the roll over so that the seam is facing down. Cut roll crosswise into 12 1-inch-thick pieces and place on prepared baking sheet or pie pan. Cover, and let rise in warm place 45 minutes, or until doubled in size.
  9. Preheat oven to 375°F. Bake cinnamon rolls for 18 to 20 minutes, or until golden in color and cooked through and no longer doughy.
  10. To make frosting, combine confectioners’ sugar and almond milk in a small bowl. Spread frosting over warm cinnamon rolls and serve!

NUTRITION

  • Serving Size: 1 roll
  • Calories: 270
  • Sugar: 19g
  • Sodium: 298mg
  • Fat: 6g
  • Carbohydrates: 48g
  • Fiber: 2g
  • Protein: 5g

Healthy Rice Crispy Treats

Hello everyone! Welcome back to my page.

Are you looking for a sweet treat that isn’t loaded with processed ingredients? Better yet, are you mindlessly searching for a quick treat to prepare for a party or gathering? Below you will find a healthier version of rice crispy treats. They are lightly sweetened with pure maple syrup, and they are also vegan and gluten free. BUT WAIT, it gets better! This dish only takes 15 minutes to prepare, AND it’s no-bake.

Mixed with melted dark chocolate and natural creamy peanut butter, these crunchy rice crispy treats are out of this world GOOD! These will definitely become one of your favorites if you love chocolate and peanut butter as much as I do.

If you tried this recipe, let me know in the comments below! I’d love to hear from you.

INGREDIENTS

  • 3 cups brown rice crispy cereal (NOT puffed rice!)
  • 1/3 cup roughly chopped dark chocolate (or sub chocolate chips)
  • 1/4 cup sprinkles (optional!)
  • 3/4 cup creamy peanut butter 
  • 1/4 cup pure maple syrup
  • 1 tbsp coconut oil
  • 1 tsp vanilla extract
  • 1/2 tsp sea salt

INSTRUCTIONS

  1. Line an 8×8 baking dish with parchment paper (it helps to lightly grease the pan to get the parchment to stick).
  2. In a large bow, mix together the rice cereal, chopped chocolate, and sprinkles (if using).
  3. On the stove top in a small pot, gently heat the peanut butter, maple syrup, coconut oil, vanilla, and sea salt until everything is smooth and well combined. Do not overheat- it should only take 1-2 minutes.
  4. Pour peanut butter mixture over the rice cereal mixture and gently stir to get everything well coated.
  5. Add mixture to the parchment-lined baking dish. Use the bottom of a jar or glass to press the mixture evenly into the baking dish until flat. Chill in refrigerator for 40 minutes before slicing. 

Serves 9, Calories 228, Total Fat 14.9 g, Total Carbs 23.5 g, Protein 5.5 g

Cranberry Chocolate Chip Banana Bread

WARNING‼️This Cranberry Chocolate Chip Banana Bread is slightly addicting, but that’s okay because it has so many health benefits!! Cranberries are known to improve immune function, lower the risk of cancer, and decrease blood pressure. 

Bananas aid with digestion, improve skin quality, and give you energy!

The best part [DARK CHOCOLATE] is loaded with antioxidants that reduce oxidative stress which helps prevent diseases such as cardiovascular disease.  Dark chocolate also improves blood flow and helps to lower cholesterol levels.

Let know how you liked it in the comments below!

INGREDIENTS

  • 1 1/4 cup oat flour
  • 3/4 cup almond flour
  • 1 teaspoon baking soda
  • 1/4 teaspoon sea salt
  • 2 Tablespoons melted coconut oil
  • 1/3 cup coconut palm sugar
  • 2 Tablespoons maple syrup
  • 3 medium overripe bananas, mashed
  • 2 eggs
  • 1 teaspoon pure vanilla extract
  • 1/3 cup dried cranberries, roughly chopped
  • 1/3 cup chocolate chips

INSTRUCTIONS

  1. Preheat oven to 350°F. Line an 8×5-inch loaf pan with parchment paper, letting the excess hang over the long sides a bit. Spray the inside with cooking spray.
  2. In a large bowl, combine flours, baking soda and salt. 
  3. In a separate mixing bowl use a hand mixer (or stand mixer) to combine coconut oil, coconut sugar and maple syrup. Add in mashed bananas, eggs and vanilla until well blended. 
  4. Add flour and mix until just blended. Don’t over mix. Gently stir in cranberries and chocolate chips.
  5. Pour batter into loaf pan, smooth top and bake in preheated oven for 60 to 65 minutes, until a toothpick inserted into center of the loaf comes out clean. Let bread cool in pan for 15 minutes, then turn out onto a wire rack to cool completely. 

Peanut butter Banana Oatmeal Cups

These quick and easy peanut butter and banana oatmeal cups are the perfect on-the-go breakfast for all of you busy people out there! And honestly, who doesn’t love this classic combo?

These oatmeal cups are full of flavor with healthy ingredients, AND they can be eaten with one hand!

Added bonus: You can freeze them for later use, and the flavor is still just as delicious!

INGREDIENTS

  • 3 cups rolled oats
  • 1/2 teaspoon cinnamon
  • 1 teaspoon baking powder
  • 1/2 teaspoon sea salt
  • 1 1/2 cups milk (I like using unsweetened vanilla almond milk)
  • 2 Tablespoons ground flaxseed
  • 2 mashed bananas (about 1/2 cup)
  • 1/4 cup maple syrup
  • 6 Tablespoons peanut butter
  • 1 teaspoon vanilla extract
  • banana slices, for topping (optional) *Do not add if storing for later.

INSTRUCTIONS

  1. Preheat oven to 350°F and line a 12-cup muffin tin with paper liners. Spray liners with non-stick spray.
  2. In a large bowl, mix rolled oats, cinnamon, baking powder and salt.
  3. In another bowl, whisk together almond milk and flaxseed. Let sit for about 5 minutes before adding remaining wet ingredients: mashed banana, maple syrup, peanut butter and vanilla.
  4. Pour wet ingredients into the large bowl with the dry ingredients. Gently stir to combine.
  5. Scoop mixture evenly into muffin tin with liners and top each cup with slice of banana, if desired.
  6. Bake 30-35 minutes or until the center of the cups has set and a toothpick comes out clean. Allow cups to cool before transferring to a storage container and placing them in the fridge or freezer.

Healthy Samoa Girl Scout Cookies

It’s Girl Scout cookie season, and I know how difficult it is to pass these up. Below is a 4-ingredient healthy version of the famous Samoa Girl Scout cookies. This recipe contains absolutely ZERO refined sugars, and it’s vegan, gluten free, and paleo friendly. These cookies taste just like the real deal, so go ahead and give them a try!! Let me know how you like them in the comments below.

They even look like the real deal!

INGREDIENTS

  • 1 cup pitted medjool dates
  • 1 cup unsweetened shredded coconut
  • 1/3 cup dark chocolate (chips or a chopped bar)
  • 1/2 teaspoon coconut oil

INSTRUCTIONS

  1. Pre-heat oven to 400°F. Spread the shredded coconut onto a baking sheet for toasting. Place in oven for 5-10 minutes, until coconut is a light golden brown color. Make sure to stay in the kitchen watch the coconut, as it can easily go from toasted to burnt. Alternately, you can toast the coconut in a pan on the stove-top.
  2. Add dates and toasted coconut into the bowl of a food processor. Pulse until mixture is combined and starts to form a ball of dough.
  3. Remove from food processor, roll 1 Tablespoon size pieces of dough into a ball and then shape into a round cookie. Using a straw or chopstick punch a hole in the middle of the dough. Move the straw or chopstick around a bit to make the hole wider, if needed. At this point you’ll likely need to reshape the cookie a bit.
  4. Place all cookies on a sheet lined with parchment and transfer to the freezer to harden up a bit. While cookies are in the freezer, add chocolate and coconut oil to a shallow microwave-safe bowl and melt in 20-30 second increments until the chocolate is melted enough to drizzle.
  5. Grab cookies from the freezer and dip each one in the chocolate to coat the bottom. Place cookies on the parchment and use remaining chocolate to drizzle over top the cookies. Transfer cookies back into the freezer for 10-15 minutes to let the chocolate harden. Once they’ve hardened you’ll be able to easily remove the cookies from the parchment paper. If you want to enjoy right away, let them sit out on the counter for a few minutes. For enjoying later, store in a sealed container in the fridge for up to one week. Freeze for up to 3 months.

Creamy Cajun Veggie Pasta

Hey guys!

Welcome to my page! Below you will find a recipe that is healthy and delicious! This dish is loaded with cauliflower, bell peppers, and a seasoning mix that is out of this world! Give it a try, and let me know how you like it in the comments below.

INGREDIENTS

  • 1 (8 oz) box of pasta of choice
  • 2 tbsp olive oil or butter
  • 1 cup of cauliflower, chopped into small florets
  • 1 bell pepper, diced
  • 5 green onion, diced
  • 1 (14.5 oz) can of diced fire roasted tomatoes
  • 1 (5.3 oz) container of siggi’s plain 0%
  • 3–4 tbsp pasta cooking water  

CAJUN SEASONING:

  • 2 tsp smoked paprika
  • 1 tsp oregano
  • 1 tsp thyme
  • ½ tsp garlic powder
  • ½ tsp onion powder
  • ¼ tsp black pepper
  • ¼ tsp sea salt, or to taste
  • Dash of cayenne, more to taste 

INSTRUCTIONS

1.     Start by making the pasta according to the directions on the box. Be sure to reserve ¼ cup of the pasta water just before straining!

2.     While the pasta is boiling, cook the cauliflower and bell pepper. Heat a large skillet over medium heat with the avocado oil. Sauté the veggies until soft and slightly browned, 5-7 minutes.

3.     While veggies are cooking, combine all of the seasonings in a small bowl. Set aside.

4.     Once the cauliflower and bell pepper are soft, stir in the green onion, then reduce heat to low. Stir in the tomatoes and the seasoning mix. Allow to heat on low for about 5 minutes, then stir in the yogurt and remove from heat. 

5.     Return the cooked pasta to it’s pot, and stir in the veggies/sauce. Slowly add the pasta water until desired consistency is reached; taste and adjust cayenne and/or salt levels. Serve and enjoy!

My First Blog Post!

In my food world, there is no fear or guilt, only joy and balance.

-Ellie Krieger

I seriously cannot believe this is real. I have dreamed about owning my own website for so long now, and this dream has finally come true! I am so passionate about food and nutrition, and I wanted to find a way to make recipes that are not only delicious, but healthy too! All of my recipes are based with real, wholesome ingredients, and I can’t wait to share them with you.

This journey has only just begun, so stay tuned for more.! Subscribe below to get notified when I post new updates.

Introduce Yourself (Example Post)

This is an example post, originally published as part of Blogging University. Enroll in one of our ten programs, and start your blog right.

You’re going to publish a post today. Don’t worry about how your blog looks. Don’t worry if you haven’t given it a name yet, or you’re feeling overwhelmed. Just click the “New Post” button, and tell us why you’re here.

Why do this?

  • Because it gives new readers context. What are you about? Why should they read your blog?
  • Because it will help you focus you own ideas about your blog and what you’d like to do with it.

The post can be short or long, a personal intro to your life or a bloggy mission statement, a manifesto for the future or a simple outline of your the types of things you hope to publish.

To help you get started, here are a few questions:

  • Why are you blogging publicly, rather than keeping a personal journal?
  • What topics do you think you’ll write about?
  • Who would you love to connect with via your blog?
  • If you blog successfully throughout the next year, what would you hope to have accomplished?

You’re not locked into any of this; one of the wonderful things about blogs is how they constantly evolve as we learn, grow, and interact with one another — but it’s good to know where and why you started, and articulating your goals may just give you a few other post ideas.

Can’t think how to get started? Just write the first thing that pops into your head. Anne Lamott, author of a book on writing we love, says that you need to give yourself permission to write a “crappy first draft”. Anne makes a great point — just start writing, and worry about editing it later.

When you’re ready to publish, give your post three to five tags that describe your blog’s focus — writing, photography, fiction, parenting, food, cars, movies, sports, whatever. These tags will help others who care about your topics find you in the Reader. Make sure one of the tags is “zerotohero,” so other new bloggers can find you, too.

Design a site like this with WordPress.com
Get started